The Secret Weapon Against Knee Pain Isn’t Rest—It’s Smart Movement
Let’s be honest. If you have chronic knee pain, the thought of twisting yourself into a pretzel—or even just sitting cross-legged—probably makes you want to hide under a blanket. The word “yoga” might conjure up images of deep lunges and pretzel poses that look like a one-way ticket to a flare-up. You are not alone in feeling this way. For millions of people, knee pain is a daily reality, a creaky, stubborn companion that whispers, “Take it easy,” or worse, “Don’t move at all.”
But here’s the interesting, counter-intuitive truth that physical therapists and yoga experts have known for ages: The worst thing you can do for a painful, weak joint is stop moving it entirely. Your knees, those incredible hinges that carry you through life, crave strength and stability from the muscles around them. Rest alone won’t give them that support. It often does the opposite, leading to atrophy—the slow weakening of the very muscles your knees rely on.
The Problem Isn’t Always the Knee Itself
Think of your knees as the innocent middle managers in a dysfunctional workplace. They take the stress from the tight hamstrings and weak glutes (the “employees” above and below them) and they’re the first ones to complain! Most knee pain—especially the non-traumatic kind (meaning you didn’t just fall off a ladder or twist it badly)—stems from muscular imbalances in the hips and feet. We sit too much, our hips get tight, our glutes fall asleep, and suddenly, the knees have to pick up the slack, tracking incorrectly with every step.
That’s where gentle, smart yoga comes in.
This isn’t about standing on your head or achieving some Instagram-worthy pose. This is about therapy, alignment, and building a powerful, protective armor of muscle around your joints. We will focus on movements that:
- Strengthen the glutes, quads, and core (the knee’s bodyguards).
- Stretch the hips and hamstrings (the tight trouble spots).
- Improve alignment so your knee cap glides smoothly, without grinding.
- Teach you how to feel when a movement is helpful versus harmful.
What You Will Gain From This 3,000-Word, People-First Guide
Forget the complicated Sanskrit names and the intimidating studio jargon. This comprehensive guide will walk you through a complete, gentle yoga program specifically designed for joint care. By the time you finish reading, you will have a clear, easy-to-follow toolkit, including:
- The Golden Rules of Knee Safety in a yoga practice.
- Floor-Based Foundations (where we build strength without standing).
- Standing Stabiliers (gentle poses to re-educate your muscles).
- Essential Props (how to use blankets, blocks, and straps like a pro).
- A Sample Practice Flow you can start using today.
Ready to swap that sharp, nagging pain for a feeling of powerful, supported stability? Let’s unroll the mat (or just clear a spot on the carpet) and get started.
🛑 The Non-Negotiable Rules of Yoga for Knee Pain: Before You Begin
Before you attempt any pose, we must talk about safety. This is the Expertise and Trustworthiness part of our guide. We are not doctors, and you should always consult your physician or physical therapist before starting a new exercise program, especially if you have a diagnosed condition like severe arthritis, a recent injury, or a ligament tear.
Assuming you have the green light for gentle movement, here are the three absolute, golden rules you must commit to:
1. Zero Tolerance for Sharp Pain
This is the most important rule. Sharp, stabbing, or grinding pain is your body yelling, “Stop!” You must listen to it immediately.
- Good Pain: A sensation of muscle fatigue, shaking, or a deep, dull stretch in the belly of the muscle (like your hamstring or glute).
- Bad Pain: Any sensation felt directly in the knee joint—at the front, on the sides, or at the back. It often feels pointy, like a pinch or a jab.
If you feel bad pain, immediately back out of the pose by 10% or more, or use a prop (like a folded blanket under the knee cap). No pain, no gain is an absolute myth when dealing with joints. Our goal is strength without strain.
2. Never Hyperextend (The Micro-Bend Rule)
If you are double-jointed or naturally very flexible, you might lock your knees back when standing straight, creating a slight backward bend. This hyperextension puts massive pressure on the ligaments (the ACL, PCL, etc.) and pushes bone on bone.
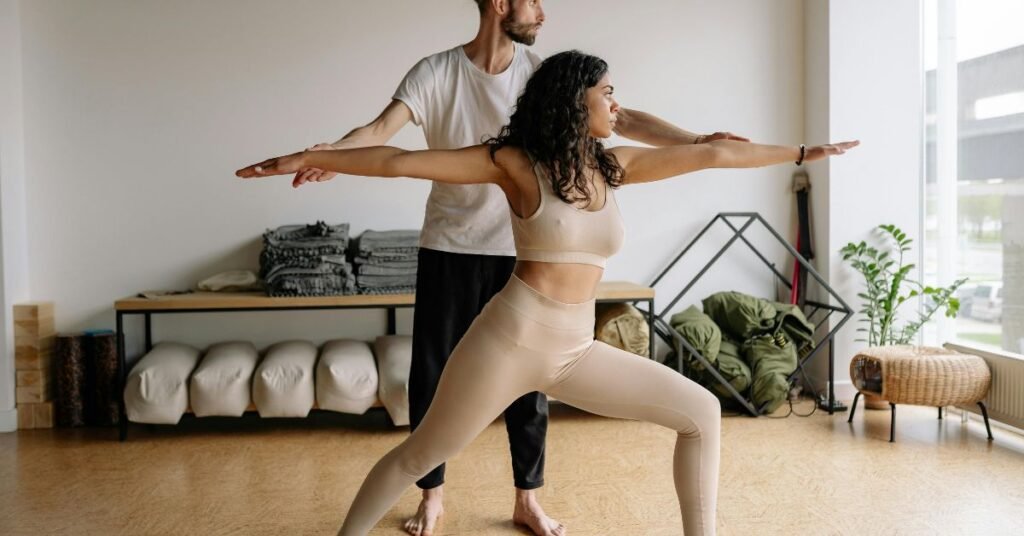
- The Fix: In any standing or straight-leg pose (like Triangle or even just Mountain Pose), put a tiny, almost invisible micro-bend in your knee. Imagine you’re holding a fragile butterfly under your kneecap—you want to hold it gently, not crush it. This forces the muscles (quads) to engage and protect the joint instead of letting the ligaments do all the work.
3. Knee Tracks Over the Second Toe (The Alignment Rule)
In every bent-knee pose (like Chair Pose, Warrior, or High Lunge), the center of your kneecap must line up directly over the center of your ankle and the second toe.
- The Error: If your knee falls inward (collapses toward the big toe) or outward (drifts toward the pinky toe), the kneecap tracks incorrectly. Over time, this causes friction and pain.
- The Fix: Use a visual check! Pause in the pose, look down at your front foot, and gently adjust your knee. A great trick: place a yoga block (or a thick book) between your upper thighs in Chair Pose. Squeezing it slightly forces the outer hip muscles to engage, which helps your knee stay in the correct alignment.
🛡️ Part I: Floor-Based Foundations — Building Your Joint Armor
The safest and most effective way to start strengthening the muscles around your knees is on your back or belly. These poses are non-weight-bearing, meaning your joints bear little to no vertical load, allowing you to focus purely on muscular engagement and stability.
1. Bridge Pose (Setu Bandhasana) – The Glute Wake-Up Call
The gluteus muscles (your butt) are the powerhouse of the entire leg. If they’re weak, your knees take the brunt of every step. Bridge Pose is a fantastic way to wake them up.
- How to Do It (The Safe, Slow Way):
- Lie on your back with your knees bent, feet flat on the floor, hip-distance apart, and your heels close to your butt.
- Make sure your knees track straight forward—don’t let them splay out or collapse in. (Tip: You can place a strap or belt around your thighs, just above the knees, to remind them to stay hip-distance apart).
- Press down firmly through your feet.
- Engage your core and glutes (squeeze your butt!) as you slowly lift your hips toward the ceiling.
- Lift only as high as you can without letting your knees splay out. The work should be in your hamstrings and glutes, not your lower back or knees.
- Hold for 3-5 breaths, focusing on the strength in your glutes. Slowly lower down one vertebra at a time.
- Pro-Tip for Extra Stability: Hug a yoga block (or a firm pillow) between your thighs. Squeezing it gently keeps the knees perfectly aligned and fires up the inner thigh muscles (adductors) which are crucial for stability.
2. Reclining Hand-to-Big-Toe Pose (Supta Padangusthasana) – The Gentle Hamstring Release
Tight hamstrings pull on the back of your knee, often causing pain and misalignment. This reclined stretch allows you to lengthen them without the strain of a forward fold.
- How to Do It:
- Lie on your back, extending your left leg straight out (or keep the left knee bent with the foot flat—your choice for comfort).
- Draw your right knee toward your chest. Loop a yoga strap (or a bath towel) around the ball of your right foot.
- Extend your right leg toward the ceiling. The leg does not need to be perfectly straight! Keep a slight bend in the knee.
- Hold the strap and gently pull your foot toward your head until you feel a comfortable stretch in the back of your thigh. Remember: micro-bend in the knee! If you feel any strain behind the knee, ease up and bend the knee more.
- Hold for 30-60 seconds, then switch sides.
3. Staff Pose (Dandasana) – The Essential Quad Activation
This might look like just sitting down, but it’s actually one of the most powerful ways to strengthen the VMO (Vastus Medialis Oblique—the teardrop-shaped muscle on the inside of the knee) and teach the quads to engage and protect the kneecap.
- How to Do It:
- Sit up tall on the floor (or better yet, on the edge of a folded blanket to tilt your pelvis forward). Extend both legs straight out in front of you.
- Flex your feet, pulling your toes back toward your face.
- Now, without moving your foot, actively press the backs of your knees and thighs down into the floor. You should see your kneecaps lift and feel the muscles of the thigh contract. This is the activation!
- Hold this strong muscular engagement for 5-10 seconds, release, and repeat. This simple action directly targets the muscles responsible for stabilizing your kneecap. This is pure, non-weight-bearing knee therapy.
🛠️ Part II: Essential Tools—The Power of Props (Your New Best Friends)
The difference between pain and comfort in yoga often comes down to the clever use of props. They aren’t “cheats”—they are alignment tools that allow you to feel the correct muscle engagement without stressing a vulnerable joint.
1. The Yoga Block: Your Alignment Coach
- For Standing Poses (e.g., Chair Pose/Warrior II): As mentioned, squeezing a block between your upper thighs forces hip alignment and prevents the knee from collapsing inward. This is gold for knee stability.
- For Seated Poses (e.g., Hero Pose/Virasana): If sitting upright with knees bent causes a sharp, pinching sensation, sit on a block or a stack of thick books placed between your feet. This raises your hips, decreasing the intense bend and compression in the knee joint, which makes the pose accessible and pain-free.
2. The Blanket/Towel: Your Soft Landing
- For Kneeling: If you need to kneel (like in Cat-Cow or Low Lunge), fold a thick blanket or towel and place it directly under your kneecaps. This provides a soft cushion and protects the bony points from the hard floor.
- For Support: In poses like Child’s Pose (Balasana), roll a blanket and place it behind your knees, in the crease. This prevents a too-deep flexion, reducing pressure on the joint.
🏔️ Part III: Standing Stabilizers—Re-Educating Your Walking Muscles
Once you feel comfortable with the floor work, you can begin to introduce standing poses. These help you translate your new muscle awareness into movements you use every day, like walking and standing up.
1. Chair Pose (Utkatasana) – The Knee-Safe Squat
This pose is like a slow-motion, controlled squat—the king of knee-strengthening exercises. It builds strength in the quads and glutes simultaneously.
- How to Do It (The Gentle Way):
- Stand with your feet hip-distance apart. Micro-bend your knees.
- Imagine a chair is behind you and slowly start to sit back, hinging at the hips.
- Look down: You must still be able to see your toes. If your knees are coming past your toes, sit your hips back more! (Alignment Check: Knee over Ankle/Second Toe).
- Bring your arms forward (or up, if comfortable for your shoulders).
- The Key: Go only as low as you can without any knee pain. Even a small, 10-degree bend is a massive starting point!
- Hold for 5-10 seconds, feeling the burn in your thighs and glutes. This is good pain—it means the muscles are working!
2. Warrior II (Virabhadrasana II) – Hip & Thigh Power
Warrior II is fantastic because it strengthens the legs and stretches the hips, but it requires diligent attention to alignment.
- How to Do It:
- Step your feet wide apart, about one leg’s length. Turn your right foot out 90 degrees and your left foot slightly in.
- Lunge into your right knee, making sure your knee is directly over your ankle (90-degree angle, or less if that causes pain). You should be able to see your big toe just inside your knee.
- Keep your torso upright and arms extended out to the side.
- The Critical Check: Is your right knee collapsing inward? If so, think about gently pressing your knee open toward the little toe side of your foot. Never force it, just encourage it.
- Hold for 3-5 deep breaths, then straighten your leg to rest before switching sides.
🔄 Part IV: Targeted Release – Stretching What’s Tight
3. Lying Figure-Four (Supine Pigeon) – The Ultimate Hip Fix
- Why it’s essential: Releases the piriformis and glutes, which directly impact how the knee tracks.
- Detailed steps & safety modifications (e.g., foot position, blanket under the head).
4. Calf Stretch at the Wall – Preventing the Pull
- Why it’s essential: Tight calves pull on the Achilles tendon, which can transfer strain up to the knee.
- Detailed steps for wall-based stretch and a seated version.
5. Reclined Spinal Twist (Supta Matsyendrasana) – Core Connection
- Why it’s essential: Core strength is crucial for pelvic stability, and a stable pelvis means happy knees.
- Focus on keeping shoulders grounded and using props for knee support.
📐 Part V: Alignment Deep Dive – Common Mistakes That Hurt
1. The Tree Pose Trap (Vrikshasana): Where NOT to Place Your Foot
- Warning against placing the foot directly on the knee joint.
- Safe placement options (below the knee or above it).
2. Deep Squats and Kneeling: When to Skip a Pose
- Poses to substitute (e.g., High Lunge instead of Low Lunge, supported Hero instead of full Hero).
- A comprehensive list of poses to avoid initially (e.g., Lotus, Full Hero, Deep Crescent Lunge).
3. Understanding Your Body’s Unique Blueprint
- The difference between compression (bad) and tension (good).
- Encouraging self-advocacy in a class: It’s okay to modify!
📅 Part VI: Your 15-Minute Daily Knee-Care Flow
1. Warm-Up (5 Minutes)
- Cat-Cow (with blanket under knees)
- Pelvic Tilts (on back)
2. Strengthening Circuit (5 Minutes)
- Supported Bridge Pose (with block)
- Staff Pose (Dandasana) Quad Activations
- 5 Breaths of Chair Pose (supported at a wall)
3. Stretching & Cooling Down (5 Minutes)
- Lying Figure-Four stretch
- Reclining Hand-to-Big-Toe (with strap)
- Savasana (Corpse Pose) – The essential resting pose
🧑⚕️ Part VII: The Long View – Making Yoga a Lifestyle
1. The Importance of Consistency Over Intensity
- Why a 10-minute daily practice beats a 90-minute weekly class.
- Connecting breath to movement (pranayama for pain management).
2. Beyond the Mat: Practical Knee-Care Habits
- The role of supportive footwear.
- Sitting and standing with better alignment.
3. Final Word: Trust the Process (and Your Body!)
- A reassuring, human-tone conclusion that reinforces the main message of empowerment and gradual, sustainable progress.
Conclusion & Next Step
The journey to happy, stable knees is a marathon, not a sprint. By focusing on gentle, intentional movements that strengthen your supporting muscles and prioritizing proper alignment, you are giving your body the long-term protection it truly needs. Remember the three golden rules: no sharp pain, micro-bend the knee, and knee over second toe. Be kind to your knees, and they will carry you farther than you think.

Theo is a dedicated yoga instructor with over six years of experience guiding individuals toward balance, strength, and inner peace through the transformative practice of yoga.As the founder of Pure Yoga Vibes, Theo offers expert insights, inspiring routines, and a wealth of knowledge to support your wellness journey. Committed to fostering a space for growth and mindfulness, Theo’s mission is to make yoga accessible, enjoyable, and meaningful for everyone.
For inquiries or collaborations, feel free to reach out at contact@pureyogavibes.com.