Introduction: Why Your Back is Stiff and Why Yoga is Your New Best Friend
Look, let’s be honest. If you’re here, you probably know the feeling. That awful, sharp, dull, or nagging ache in your lower back. It’s the pain that turns a simple task, like picking up a sock, into a complex, groan-inducing Olympic event. Maybe you spent too long hunched over a laptop (hello, modern life!), or perhaps you lifted that heavy box with all the grace of a cartoon character. Whatever the reason, your lower back is staging a protest, and you’re searching for a peace treaty.
Here’s a newsflash: You are not alone. Lower back pain is one of the most common reasons people miss work and visit the doctor. It’s practically an epidemic! But before you resign yourself to a lifetime of heating pads and complicated stretches you saw on a grainy YouTube video, I have a genuinely good solution for you: Yoga.
“Wait, yoga? Isn’t that for bendy people who can touch their toes while balancing a cup of tea on their head?” Nope! Throw that image right out the window. The best yoga for lower back pain isn’t about pretzel poses or looking perfect; it’s about gentle movement, mindful stretching, and building strength that actually supports your spine. Think of it as physical therapy wrapped in a cozy blanket of relaxation.
This is your ultimate guide, a deep dive—a genuine, human-to-human talk—on the best, safest, and most effective yoga poses to not only relieve that current ache but also to build a stronger, happier back for the long run. We’re going to get into the why and the how, complete with simple steps, modifications for every body, and, crucially, the poses you should probably avoid right now.
Forget the quick fixes. We’re building a long-term relationship with a back that says, “I got this.” So, roll out your mat (or just find a soft spot on the floor), take a deep breath, and let’s start moving from “ouch” to “ahh.”
🧘♀️ Part 1: The Essential Foundation—Gentle Poses to Calm the Storm
When your back is truly hurting, the last thing you want is a powerful, complicated movement. You need poses that whisper, not shout. These foundational poses are your first line of defense—they bring gentle movement and blood flow to the area, relax tight muscles, and give your stressed-out spine a much-needed break. They are the true backbone of your lower back pain relief routine.
1. Child’s Pose (Balasana): The Ultimate Rest and Reset
If yoga had a comfort food, this would be it. Child’s Pose is incredibly restorative and an essential resting spot, but it’s also a deeply therapeutic, gentle back stretch. It’s what you do when your back needs a big, warm hug.
Why It Works Wonders
- Spine Lengthening: It gently pulls the spine, decompressing the vertebrae (the little bones in your back) and creating space.
- Hip and Thigh Relaxation: It stretches the hips and thighs, which are often connected to—and contribute to—lower back tension.
- Mind-Body Connection: It encourages a mindful focus on your breath and helps you release tension. It’s a great way to tell your nervous system, “It’s okay to relax now.”
How to Get Into the Pose (No Jargon, Just Simple Steps!)
- Start on all fours: Get onto your hands and knees on your mat. Imagine you’re about to crawl like a baby, but a grown-up, mindful baby.
- Knee Placement: Bring your big toes to touch and either keep your knees together (for a less intense hip stretch) or, for a more restorative pose that gives your belly room, widen your knees out toward the edges of your mat.
- The Bow: Exhale and gently sink your hips backward, letting your butt rest as close to your heels as is comfortable. Stop if this movement hurts! You never push through pain.
- Forehead Down: Walk your hands forward on the floor until your forehead can rest gently on the mat, or on a prop (more on that in a moment). Your arms can be stretched forward or resting alongside your body, palms facing up.
- Let Go: Let your entire torso become heavy. Allow your back to round slightly. Feel the stretch running from your tailbone all the way to your neck. Take 5 to 10 slow, deep breaths here. Seriously, breathe into your back; imagine the breath creating space.
Pro-Tip: Essential Modifications for Comfort
- Knees Don’t Reach Heels? Place a folded blanket or a bolster (a long pillow) between your heels and your butt. This takes the pressure off your knees and makes the hip flexors happier.
- Forehead Doesn’t Reach the Floor? Use a yoga block or a stack of books under your forehead. No need to strain your neck to get down low!
- Knees Hate the Floor? Fold your mat over or put a blanket under your knees for extra cushioning.
2. Cat-Cow Pose (Marjaryasana-Bitilasana): The Gentle Spine Massager
If Child’s Pose is the warm hug, Cat-Cow is the loving, low-impact massage for your spine. This pose is actually two movements flowing together, and it’s the perfect way to wake up and mobilize the vertebrae without stressing them.
Why It Works Wonders
- Spinal Mobility: This fluid movement brings much-needed movement to the spine, lubricating the discs and promoting flexibility. It’s like oiling a rusty hinge.
- Core Engagement (Subtle but Important): The “Cat” phase requires you to pull your belly button toward your spine, which subtly strengthens the core—your back’s best friend.
- Breath Synchronization: Connecting the movement to your breath (inhale for Cow, exhale for Cat) helps you move slowly and mindfully, preventing quick, jarring motions that can hurt your back.
How to Get Into the Pose
- Tabletop Start: Get onto your hands and knees, just like in the beginning of Child’s Pose. Make sure your hands are directly under your shoulders and your knees are directly under your hips. Your back should be flat (neutral spine).
- Cow Pose (Inhale): Take a deep breath in. As you inhale, gently drop your belly button toward the floor, lift your chest and your tailbone up toward the sky. Look slightly forward (don’t crunch your neck back too far). This is the gentle arch.
- Cat Pose (Exhale): Now, breathe out. As you exhale, tuck your tailbone under, draw your belly button strongly up toward your spine, and round your entire back toward the ceiling like a Halloween cat. Let your head drop toward the floor. This is the gentle curve.
- Flow: Inhale into Cow, exhale into Cat. Move slowly, making the movement smooth and continuous. Repeat this flow for 1 to 2 minutes, following the natural rhythm of your breath. If any part of the movement causes a sharp pain, make the movement much smaller, or skip that part entirely.
Pro-Tip: Essential Modifications for Comfort
- Wrist Pain? Place your hands on a set of blocks or make fists with your hands instead of pressing your palms flat. You can also try doing the pose while standing, placing your hands on a wall or a countertop.
- Sensitive Knees? Again, a folded blanket or a towel under your knees is always a good idea.
3. Knees-to-Chest Pose (Apanasana): The Decompressor
This pose is simple, done lying on your back (the safest position!), and provides a wonderful, easy stretch for the lower back. It’s like hitting the ‘reset’ button on your spine.
Why It Works Wonders
- Low Back Relief: It gently pulls the sacrum (the triangular bone at the base of the spine) off the floor, rounding the lower back and creating a feeling of release and decompression.
- Gentle Hip Flexor Stretch: Holding your knees toward your chest also offers a mild stretch to the hip flexors, which are often tight from sitting.
- Ultimate Relaxation: Lying down is inherently relaxing. The slight pressure on the abdomen also helps calm the digestive and nervous systems.
How to Get Into the Pose
- Lie Down: Lie flat on your back on your mat. This is your safe zone.
- Pull One Knee: Bend your right knee and use your hands to gently pull it toward your chest. Keep your left leg either extended on the floor or bent with your foot on the floor—choose what feels best for your lower back.
- Hold and Breathe: Hold the back of your right thigh or the top of your shin. Keep your shoulders relaxed and your neck long. Breathe deeply for 30 seconds to a minute.
- Repeat: Slowly release the right leg and repeat the same steps with your left knee.
- Full Pose (Optional): If both sides felt good, you can then hug both knees into your chest at the same time for the full pose. Keep the movement slow and the pull gentle.
Pro-Tip: Essential Modifications for Comfort
- Tight Hips? Place a rolled-up towel or small pillow under your head to keep your chin slightly tucked and your neck long.
- Can’t Reach the Knee? Loop a yoga strap, a towel, or even a tie around your shin or hamstring and use the strap to gently pull your leg toward you. This lets your hands and shoulders stay relaxed.
🏋️ Part 2: Building Spinal Support—The Strengthening Poses
Relief is one thing, but to truly banish lower back pain, you need strength. Many people focus on stretching, but weakness in the surrounding muscle groups (especially your core and glutes) often forces your lower back to overcompensate. These poses help you build a strong, supportive corset of muscle around your spine.
4. Bridge Pose (Setu Bandhasana): Glute and Core Powerhouse
This is one of the most underrated poses for back health. It’s a gentle backbend, yes, but it’s an absolute hero for strengthening the glutes and hamstrings, which are often the forgotten heroes of spinal support. When your butt muscles are strong, your lower back can relax!
Why It Works Wonders
- Activates Glutes: It’s a powerhouse for your gluteal muscles (your butt), the primary stabilizers of your pelvis. Strong glutes equal less work for your lower back.
- Gentle Back Extension: It creates a safe, mild backbend that helps counteract the forward slouching we do all day long.
- Core Control: When done slowly, it teaches you to engage your lower abdominals to protect your back during the lift.
How to Get Into the Pose
- Start on Your Back: Lie on your back with your knees bent and your feet flat on the floor, about hip-distance apart. Your heels should be close enough to your butt that you can just barely touch them with your fingertips.
- Ground Down: Press your feet firmly into the floor. You want to feel a solid connection.
- Lift and Breathe: On an inhale, press through your feet and gently lift your hips and tailbone up toward the ceiling. Don’t worry about lifting super high—the goal is to create a long, straight line from your knees to your shoulders.
- Engagement is Key: Squeeze your butt muscles gently. Imagine you’re holding a fragile piece of paper between your thighs to keep your knees from splaying out. Pull your lower belly slightly in and up to prevent over-arching your lower back.
- Hold and Release: Hold for 3-5 slow breaths. On an exhale, slowly lower your back to the floor, one vertebra at a time, until your tailbone rests gently down. Repeat 3 to 5 times.
Pro-Tip: Essential Modifications for Comfort
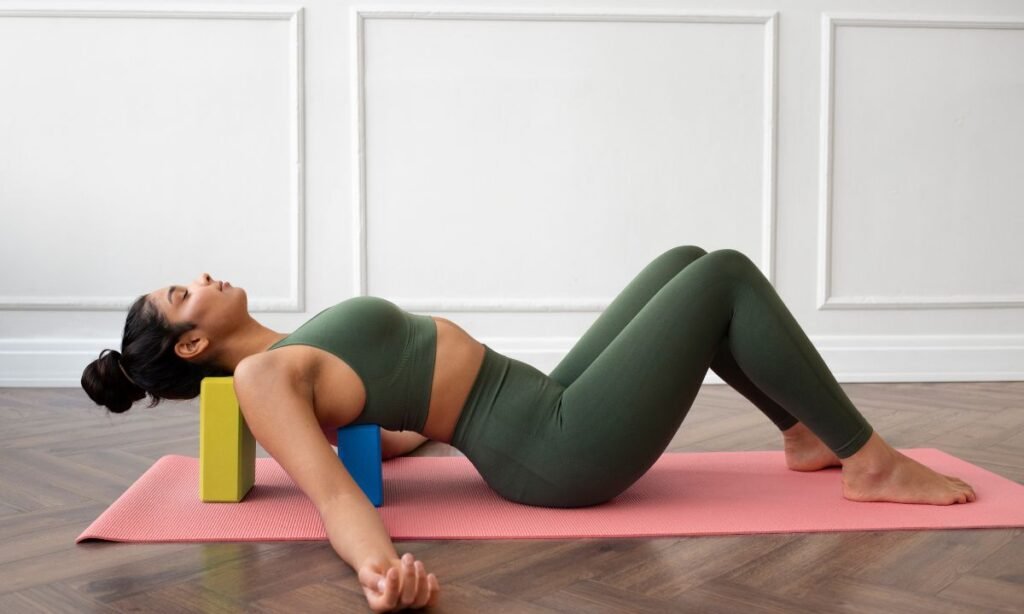
- Need Extra Support? (Restorative Bridge): Place a yoga block (or a thick, firm book) under your sacrum (the flat part of your lower back, right above the tailbone) at its lowest or middle height. You can then completely relax your muscles and let the prop hold your weight, allowing your back to decompress. This is pure bliss!
- Struggling to Engage Glutes? Try pressing your big toes down harder into the floor as you lift.
5. Sphinx Pose (Salamba Bhujangasana): The Gentle Backbend
This pose is a perfect beginner backbend. It’s a gentle, passive action that asks your spine to move in the opposite direction from sitting, which is a great way to relieve compression, but it does so without requiring a lot of muscle strength.
Why It Works Wonders
- Counteracts Slouching: It provides a safe, mild extension (backbend) of the spine, which directly counters the forward flexion we spend most of the day in (typing, driving, scrolling).
- Strengthens Erector Spinae: It subtly engages the muscles that run alongside your spine, building gentle endurance.
- Opens the Chest: It helps pull the shoulders back and down, improving overall posture that contributes to back pain.
How to Get Into the Pose
- Lie on Your Stomach: Lie face-down on your mat, legs extended behind you, tops of your feet flat on the floor.
- Elbow Placement: Bring your elbows directly under your shoulders, with your forearms parallel to each other on the floor (like a pair of railway tracks). Your palms should be flat down.
- Lift Up: Gently press your forearms into the floor and lift your head and chest up. You don’t need to push yourself high; only come up until you feel a gentle curve in your lower back.
- The Lengthening: Imagine a string gently pulling the crown of your head forward and up. Simultaneously, reach your tailbone toward your heels. This action helps to lengthen the lower back instead of crunching it.
- Hold and Breathe: Relax your butt muscles (seriously, relax your tush!) and breathe deeply for 30 seconds to a minute. Look straight ahead, or gently drop your chin toward your chest if that feels better for your neck.
Pro-Tip: Essential Modifications for Comfort
- Too Intense? Slide your elbows further forward, away from your body. This lowers the angle and reduces the backbend, making it much more gentle. You can also rest your forehead on your stacked hands.
- Feeling a Pinch? Try pressing your pubic bone (the front of your pelvis) down into the floor, which helps lengthen the tailbone. If it still pinches, skip it and go to Child’s Pose.
6. Downward-Facing Dog (Adho Mukha Svanasana): Full Body Decompression
This classic pose is not just a stretch; it’s a full-body reset. It’s an inversion, a gentle stretch for the hamstrings, and a powerful lengthener for the entire back body.
Why It Works Wonders
- Spine Elongation: It’s famous for decompressing the spine. By pushing your hips high and back, you create a beautiful, long line of traction.
- Hamstring Relief: Tight hamstrings (the muscles on the back of your thighs) pull on the pelvis, which in turn stresses the lower back. Down Dog gently stretches them out.
- Shoulder and Core Strength: Holding the pose builds strength in your shoulders and upper back, which helps you maintain better posture all day long.
How to Get Into the Pose
- Tabletop Start: Begin on your hands and knees. Tuck your toes under.
- Lift Off: Exhale, press firmly into your hands, and lift your hips up and back toward the ceiling. You are aiming to make your body look like an upside-down “V.”
- Bend Your Knees! (Seriously): The biggest mistake beginners make is trying to straighten their legs completely. Bend your knees a lot! This allows your main focus to be on lengthening your spine (pushing your chest back toward your thighs) rather than straining your hamstrings or lower back.
- Hands and Head: Spread your fingers wide and press through your knuckles. Let your head hang heavy—don’t look forward.
- Pedal (Optional): You can “pedal” your feet by bending one knee and then the other, which is a great way to gently ease into a deeper hamstring stretch.
- Hold and Breathe: Hold for 5 slow, deep breaths. Return to Child’s Pose to rest.
Pro-Tip: Essential Modifications for Comfort
- Wrist Issues? Place your hands on a pair of yoga blocks. This changes the angle and can take pressure off the wrist joint.
- Back Rounding? Bend your knees more. The straight spine is far more important for back health than straight legs. Focus on pushing your tailbone up and back.
🔄 Part 3: The Gentle Twists and Hip Openers for Lasting Relief
Twisting and hip opening are critical, because tension in the hips, glutes, and side body is often the root cause of lower back pain, not just a symptom. Twists help restore natural movement, while hip openers relieve the tension caused by sitting all day.
7. Supine Spinal Twist (Supta Matsyendrasana): The Ultimate Relaxation Twist
Twists are like wringing out a wet towel for your spine—they help release deep tension and encourage blood flow. Doing a twist while lying down ensures your lower back is fully supported and you can’t over-twist.
Why It Works Wonders
- Tension Release: It gently stretches the rotational muscles of the lower back, relieving stiffness and improving range of motion.
- Hip and Outer Thigh Stretch: It provides a lovely, passive stretch to the glutes and outer hip, areas that get incredibly tight from prolonged sitting.
- Deep Relaxation: This pose is often used at the end of a practice to promote relaxation and prepare the body for rest.
How to Get Into the Pose
- Lie Down Flat: Start on your back with both knees bent and your feet flat on the floor.
- Tee-Out Your Arms: Extend both arms out to the sides, palms facing up, forming a ‘T’ shape with your body.
- Shift Hips: Gently lift your hips a tiny bit and shift them about an inch or two to the right. This helps set up the twist for a better, deeper stretch.
- The Twist: Exhale and let both of your knees slowly drop over to the left side. Let them rest on the floor, a block, or a pillow.
- Head Turn (Optional): If your neck feels okay, gently turn your head to look over your right shoulder (the opposite direction of your knees).
- Anchor and Melt: Keep your right shoulder as close to the floor as possible. If it pops way up, bring your knees up a little higher. This ensures the twist stays gentle. Breathe deeply into your belly and hold for at least one minute.
- Switch Sides: Slowly bring your knees back to the center, re-align your hips, shift them to the left, and repeat the twist on the right side.
Pro-Tip: Essential Modifications for Comfort
- Knees Don’t Reach the Floor? Place a folded blanket, a pillow, or a yoga block under your knees. The goal is rest and support, not forcing the twist.
- Shoulder Popping Up? Focus on keeping the opposite shoulder grounded, even if it means lifting the knees higher off the floor.
8. Figure Four Stretch / Reclined Pigeon Pose (Sucirandhrasana): The Sciatica Soother
If you feel pain running down your leg (classic sign of sciatica), this pose is often prescribed by physical therapists because it brilliantly targets the piriformis muscle, a deep hip rotator that can press on the sciatic nerve.
Why It Works Wonders
- Piriformis and Glute Stretch: It effectively stretches the piriformis and glute muscles, relieving the tension that often irritates the sciatic nerve.
- Pelvic Stabilization: By releasing tension in the hips, it helps the pelvis sit more neutrally, which supports the entire spine.
- Supported Position: Because you do it lying on your back, your spine is fully supported, making it safe for most lower back issues.
How to Get Into the Pose
- Start on Your Back: Lie on your back with your knees bent and feet flat on the floor, hip-distance apart.
- Cross Your Ankle: Lift your right leg and cross your right ankle over your left thigh, just above the knee. Your right foot should be flexed (pull your toes slightly back toward your shin) to protect your knee joint.
- The Thread: Gently lift your left foot off the floor. Thread your right arm through the triangle space created by your legs and clasp your hands behind your left thigh.
- Gentle Pull: Use your hands to gently pull your legs toward your chest. You should feel the stretch in your right outer hip/glute area. If you feel anything sharp in your knee, stop and adjust.
- Hold and Breathe: Keep your head and shoulders relaxed on the floor. Breathe deeply into the tight sensation in your hip. Hold for 45 seconds to a minute.
- Switch Sides: Slowly release and repeat on the other side (left ankle over right thigh).
Pro-Tip: Essential Modifications for Comfort
- Can’t Reach Your Thigh? Loop a towel or strap around your left thigh (the one you are pulling) and use the towel to assist the pull.
- Need More Depth? If the first version feels too easy, you can try clasping your hands over your left shin for a deeper stretch.
🚨 Part 4: The Golden Rules of Yoga for Back Pain
Now that you have your arsenal of safe, helpful poses, we need to cover the essentials. When dealing with back pain, your mantra is “First, do no harm.” Moving from pain requires a smart, compassionate, and consistent approach.
The Non-Negotiable “Do’s” of Back Pain Yoga
- Do See Your Doctor First! 🩺
- This is Mandatory. If your back pain is new, severe, or radiates down your leg, you must talk to a healthcare professional (a doctor or physical therapist) before starting any exercise routine. They can diagnose the issue (is it a disc problem? muscle strain? sciatica?) and tell you exactly what movements to avoid.
- Do Listen to Your Body Like a Fortune Teller.
- Your body knows best. Sharp pain, shooting pain, or a sudden, shocking feeling is your body screaming, “STOP!” Back off immediately. Gentle muscle tension or a deep stretch is fine; actual pain is not.
- Do Move from Your Core (The Inner Superhero).
- Your deep abdominal muscles are your spine’s seatbelt. Learn to gently engage them—pull your belly button lightly toward your spine—before any major movement. This protects your lower back.
- Do Use Props (Embrace the Cheats!).
- Blocks, blankets, pillows, and straps are not for weak people; they are for smart people! Props help bring the floor up to you, ensure proper alignment, and make the pose restorative instead of stressful.
The Major “Don’ts”—Poses to Approach with Extreme Caution
Certain movements can be risky if you have an underlying issue like a herniated disc, spinal stenosis, or acute muscle strain. Always proceed with caution or avoid these entirely:
- Deep, Unsupported Forward Folds (Like Standing with Straight Legs): Rounding your back to touch your toes with straight legs puts incredible strain on the lumbar discs. Instead: Always bend your knees generously in standing forward folds to let your spine lengthen without rounding.
- Intense, Deep Backbends (Like Wheel or Camel Pose): These compress the spine greatly. Instead: Stick to low, supported backbends like Sphinx Pose or Supported Bridge Pose (with a block).
- Quick, Jerky Twists: Sudden, fast twisting motions can aggravate a sensitive spine. Instead: Focus on slow, gentle, supported twists like the Supine Spinal Twist mentioned above.
- Boat Pose (Navasana) or Crunches: Anything that severely flexes the spine while requiring intense core strength can be a tricky balance. Instead: Stick to core work done flat on your back, such as pelvic tilts (gently pressing the lower back into the floor and releasing) or gentle marches with core engagement.
📈 Part 5: Consistency, Mindset, and The Long Game
You can’t do one yoga session and expect a miracle. Back health is a long-term project. It’s about creating new habits and a different relationship with your body.
Make it a Routine, Not a Chore
- Short & Sweet Trumps Long & Rarely: A consistent 10-15 minutes of the Cat-Cow, Child’s Pose, and Supine Twist every day is infinitely better than one grueling hour once a month.
- Morning Wake-Up: The back is often stiffest in the morning. Start your day with 5 minutes of gentle movement—don’t launch yourself out of bed like a missile!
- The Post-Work Reset: If you sit all day, use 15 minutes immediately after work to do Sphinx and Figure Four. It counteracts the damage of sitting before your muscles seize up.
The Power of the Breath and Mindset
Yoga is not just exercise; it’s a practice of mindfulness. Pain isn’t just a physical sensation; it’s an experience amplified by stress and fear.
- Breathe Into the Tension: When you are in a pose like Figure Four, and you feel tightness, consciously direct your slow, deep inhale to that area. As you exhale, imagine the tension melting away. This simple act can dramatically lower your perception of pain.
- Ditch the Judgment: Did you have to use three blocks and a blanket just to get into a pose? Who cares! You showed up. You honored your body’s needs. That’s a win. Let go of the need for a ‘perfect’ pose. The goal is feel, not look.
📚 Part 6: Scientific Backing—Why Doctors Recommend Yoga
If you’re a skeptic (totally fair!), you need to know this isn’t just “woo-woo” stretching. There’s serious science behind why yoga is so effective for chronic lower back pain.
- Evidence is Strong: Major organizations, including the American College of Physicians (ACP), recommend yoga as a first-line, non-drug treatment for chronic low back pain.
- A Landmark Study (The York Trial): A UK-based study (often called the York Trial) found that people offered a 12-week yoga program reported better back function and more confidence in performing everyday tasks than those offered conventional GP care, and the improvements lasted for up to a year.
- The Power of Holism: Researchers believe the benefits go beyond mere stretching. Yoga provides a combination of:
- Physical: Stretching, strengthening, and mobility.
- Mental: Mindfulness, breathing techniques (pranayama), and relaxation, which reduces the stress hormone cortisol (a major factor in chronic pain).
- Self-Efficacy: It teaches you that you have the power to manage your pain, which is incredibly empowering.
📝 Part 7: Your Custom 15-Minute Daily Back Pain Routine
Here is a simple, structured routine using the poses we discussed. It’s perfect for starting your day or de-stressing after work.
| Time | Pose | Focus | Action |
| 1 Minute | Lie on Back | Body Scan | Just lie there, notice your breath, and feel your lower back on the floor. |
| 2 Minutes | Knees-to-Chest Pose | Gentle Decompression | Right knee to chest (30 sec), left knee to chest (30 sec), both knees (1 min). |
| 3 Minutes | Cat-Cow Flow | Spinal Mobility | On all fours, move slowly with your breath. Focus on gentleness over range. |
| 2 Minutes | Sphinx Pose | Gentle Extension | Lie on your belly, elbows under shoulders. Focus on lengthening the tailbone. |
| 3 Minutes | Figure Four Stretch | Hip and Glute Release | 90 seconds per side. Use a strap if needed. Anchor your back to the floor. |
| 3 Minutes | Supine Spinal Twist | Release and Twist | 90 seconds per side. Use a blanket under your knees for support. |
| 1 Minute | Child’s Pose or Savasana | Rest and Integrate | Choose the most comfortable resting pose to close your practice. |
| Total: 15 Minutes |
💡 Part 8: Troubleshooting and Next Steps
Even with the best intentions, you might run into bumps.
- “My Pain Got Worse!” This is often due to doing too much too soon, or pushing past the “gentle stretch” boundary. Scale back significantly. Focus only on the resting poses (Child’s Pose, Savasana, Supported Bridge) for a few days, then try the Cat-Cow flow again, making the movement tiny.
- “I Can’t Commit to 15 Minutes!” Then commit to 5 minutes. Do 1 minute of Knees-to-Chest, 3 minutes of Cat-Cow, and 1 minute of Child’s Pose. Success is built on consistency, not intensity.
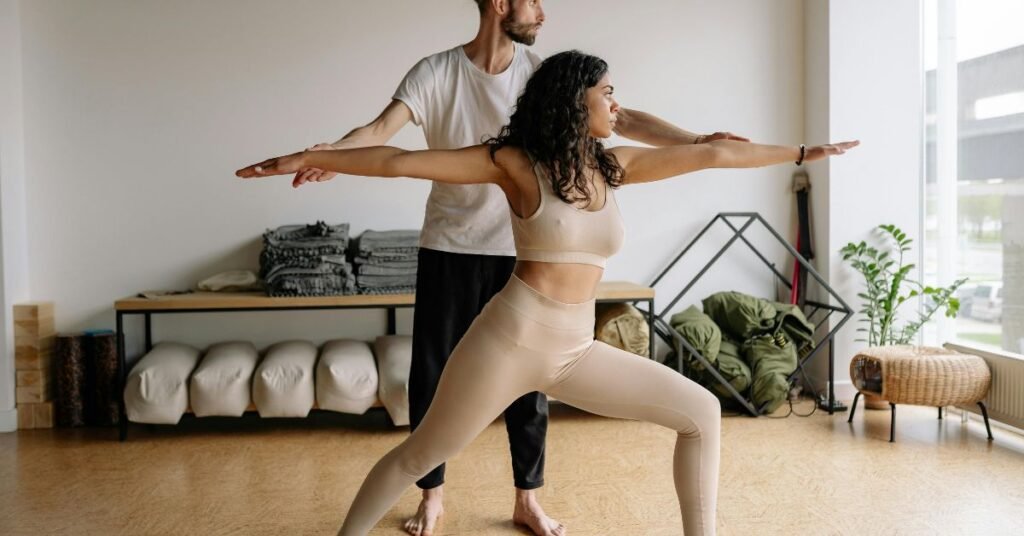
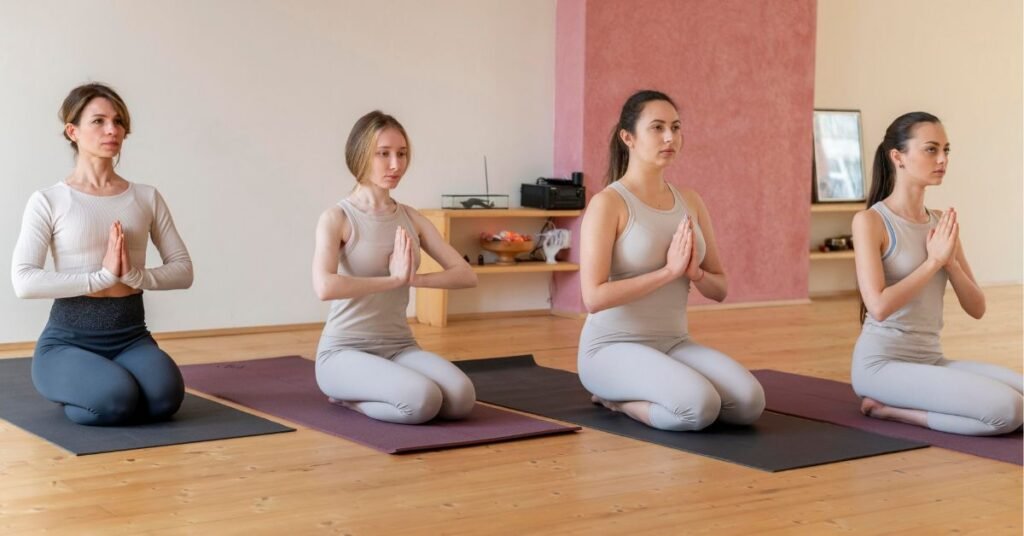
- Finding a Teacher: If you can, find an in-person, beginner, or “Gentle Yoga” class. A qualified instructor can look at your body and give you personalized adjustments that a blog post simply can’t. Look for those with training in Therapeutic Yoga or Yoga for Back Pain.
Conclusion: Your Happier, Stronger Back Starts Now
You’ve made it to the end of this epic guide! That means you’ve already taken the most important step: taking action for your own well-being.
Lower back pain is a signal—a big, flashing sign that your body needs you to slow down, strengthen up, and move with more mindfulness. Yoga offers you the perfect toolkit to answer that call. It’s safe, scientifically backed, and accessible to everyone, regardless of flexibility.
Remember, this is not a race. It is a slow, steady journey toward a happier, stronger back that supports you through all of life’s heavy lifts (literally and figuratively!). Start small, be kind to yourself, and listen to that little voice inside that tells you what feels right.
Your “ouch” moment can be the start of your “ahh” journey. Roll out that mat, even just for five minutes, and begin your practice today!

Theo is a dedicated yoga instructor with over six years of experience guiding individuals toward balance, strength, and inner peace through the transformative practice of yoga.As the founder of Pure Yoga Vibes, Theo offers expert insights, inspiring routines, and a wealth of knowledge to support your wellness journey. Committed to fostering a space for growth and mindfulness, Theo’s mission is to make yoga accessible, enjoyable, and meaningful for everyone.
For inquiries or collaborations, feel free to reach out at contact@pureyogavibes.com.