Learn everything about Malasana (Garland Pose) with this in-depth guide! Discover its benefits, step-by-step instructions, common mistakes, and exciting variations to improve flexibility, strength, and mindfulness. Perfect for all levels!
Garland Pose, also known as Malasana, is a powerful squatting yoga pose that combines strength, flexibility, and mindfulness. Whether you’re a yoga enthusiast or a beginner looking to improve your squat posture, this pose is a game-changer. In this blog, we’ll cover everything you need to know about the Malasana squat—from its benefits to step-by-step guidance, pro tips, and exciting variations.
Let’s dive deep into how this simple yet transformative pose can enhance your yoga practice and overall well-being.
What Is Malasana (Garland Pose)?
Malasana, or Garland Pose, is a deep squatting posture commonly practiced in yoga. Unlike a regular squat, this pose focuses on opening the hips, stretching the groin, and building a strong foundation for the lower body.
In Sanskrit, “Mala” means garland or necklace, symbolizing how your body forms a circular shape in this squat position. This pose not only strengthens your body but also helps ground your energy and improve your overall balance.
Why Should You Practice the Malasana Squat?
Practicing Malasana regularly offers various physical, mental, and emotional benefits. Here are some compelling reasons to include this squatting yoga pose in your routine:
1. Improves Hip Flexibility
Sitting for long hours can tighten your hips, causing stiffness and discomfort. Malasana stretches and opens up your hip flexors, increasing mobility and reducing tension.
2. Enhances Digestion
Believe it or not, this squatting posture can aid your digestion. The compression on your abdomen stimulates your digestive organs, promoting better gut health.
3. Strengthens the Lower Body
From your thighs to your ankles, Malasana engages and strengthens key muscle groups, making it an excellent exercise for building a stable lower body.
4. Improves Posture
Modern life often leaves us with rounded shoulders and poor posture. Garland Pose counteracts this by encouraging spinal alignment and lengthening the back.
5. Boosts Mindfulness
Like all yoga poses, Malasana encourages you to connect with your breath and be present in the moment. It’s a great way to release stress and ground yourself.
6. Prepares for Advanced Poses
Many advanced yoga poses, such as crow pose (Bakasana) and firefly pose (Tittibhasana), require open hips and strong legs. Practicing Malasana lays the foundation for these challenging asanas.
Readmore: Seated Forward Bend Pose (Paschimottanasana)
Readmore: 15 Best Heart-Opening Yoga Poses
How to Do Malasana: Step-by-Step Guide
Getting into the Garland Pose might feel challenging at first, but with practice, it becomes easier. Follow these steps to master the Malasana pose:
Step 1: Begin in a Standing Position
- Start by standing tall in Mountain Pose (Tadasana). Your feet should be about mat-width apart, with toes pointing slightly outward.
- Keep your spine long and your shoulders relaxed.
Step 2: Lower Into a Squat
- Bend your knees and slowly lower your hips into a deep squat position.
- Try to bring your hips as close to the floor as possible while keeping your heels grounded. If your heels lift, use a folded blanket or yoga block for support.
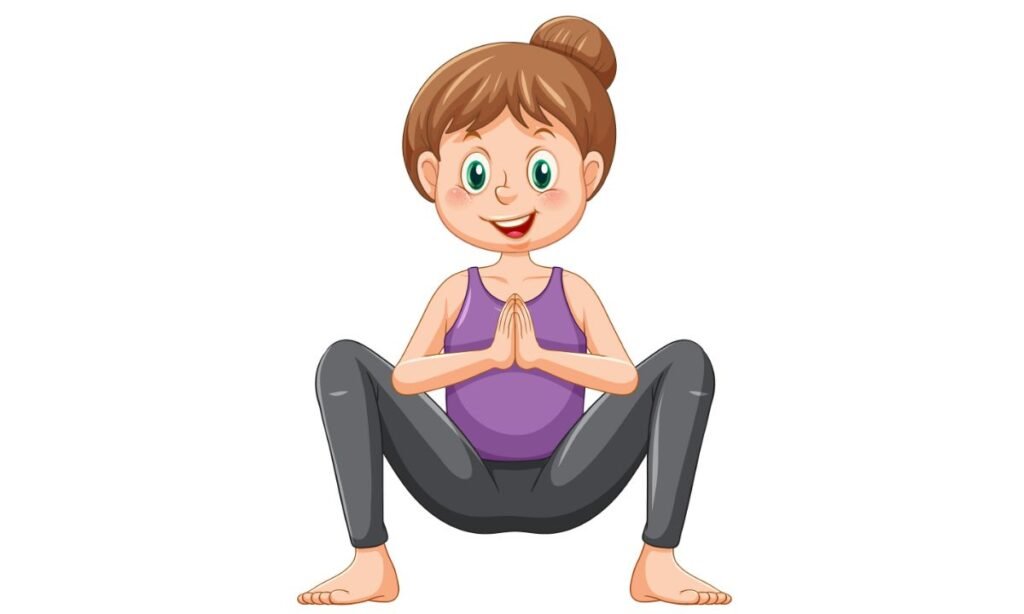
Step 3: Align Your Body
- Press your palms together in a prayer position (Anjali Mudra) at your chest.
- Use your elbows to gently push your knees apart, opening your hips.
- Lengthen your spine and lift your chest.
Step 4: Breathe and Hold
- Take deep, steady breaths as you hold the pose for 30 seconds to 1 minute.
- Focus on relaxing your hips and finding balance.
Step 5: Release the Pose
- To come out, gently straighten your legs and return to a standing position.
- Shake out your legs to release any tension.
Related Article: Half Lotus Pose Explained
Mistakes to Avoid
Even though Malasana looks simple, there are a few common mistakes beginners tend to make. Here’s how to avoid them:
Lifting the Heels
- Mistake: Heels lifting off the ground.
- Fix: Place a yoga block or rolled-up towel under your heels for support.
Rounded Back
- Mistake: Hunching the back instead of keeping it straight.
- Fix: Engage your core and focus on lifting your chest.
Knees Collapsing Inward
- Mistake: Knees falling inward.
- Fix: Use your elbows to press your knees outward gently.
Holding Your Breath
- Mistake: Forgetting to breathe.
- Fix: Take slow, deep breaths to relax and stay present.
Tips for Perfecting Your Squatting Yoga Pose
Warm Up First
Loosen up your hips and legs with light stretches or dynamic movements before attempting Malasana.
Use Props
Don’t shy away from props! A yoga block, blanket, or wall support can make the pose more accessible.
Start Slow
If you’re new to squatting poses, don’t force yourself into a deep squat. Go as low as your body allows and build up gradually.
Engage Your Core
Keeping your core engaged provides stability and prevents you from collapsing into the pose.
Practice Daily
Consistency is key. Practicing Malasana for even a few minutes a day can lead to noticeable improvements.
Variations of Malasana
Once you’re comfortable with the basic Garland Pose, try these fun variations to challenge yourself and keep your practice exciting:
1. Supported Malasana
- Sit on a yoga block or cushion for extra support.
- Great for beginners or those with tight hips.
2. Twisting Garland Pose
- Place one hand on the floor and stretch the other arm toward the sky, creating a gentle twist.
- Enhances spinal flexibility and balance.
3. Bound Malasana
- Reach one arm behind your back and the other arm under your thigh, clasping your hands together.
- Deepens the stretch and strengthens your shoulders.
4. Malasana with Side Stretch
- Extend one arm over your head while maintaining the squat.
- Stretches the side body and improves flexibility.
Related Article: How to Do Easy Pose (Sukhasana)
Garland Pose for All Levels
Whether you’re a beginner or an advanced yogi, Malasana can be tailored to suit your needs:
- Beginners: Use props like blocks or blankets to ease into the pose.
- Intermediate: Focus on holding the pose longer and refining your alignment.
- Advanced: Explore variations like arm balances or deeper twists to challenge your body.
FAQs
1 . Can everyone do the Malasana squat?
Yes, but it may require modifications for those with tight hips, knee issues, or balance challenges.
2. How long should I hold Garland Pose?
Start with 30 seconds and gradually increase to 1-2 minutes as your flexibility improves.
3. What should I do if my heels don’t touch the ground?
Use a prop like a folded blanket or yoga block under your heels.
4. Is Malasana good for lower back pain?
Yes, when done correctly, it can help relieve tension in the lower back by stretching and opening the hips.
Readmore: Table Top Pose Yoga (Bharmanasana)
Readmore: Wild Thing Pose Guide (Camatkarasana)
Conclusion
Malasana, or Garland Pose, is more than just a squatting yoga pose. It’s a powerful practice that improves flexibility, strengthens the lower body, and grounds your energy. With consistent practice and mindful adjustments, you can unlock the full benefits of this transformative pose. So grab your yoga mat, take a deep breath, and squat your way to a healthier, more balanced you!
Happy squatting!

Sonu is a passionate yoga teacher with over 6+ years of experience helping individuals find balance, strength, and inner peace through the transformative power of yoga. As the creator of Pure Yoga Vibes, Sonu shares expert insights, inspiring practices, and a wealth of knowledge to support your wellness journey. Dedicated to creating a space for growth and mindfulness, Sonu’s mission is to make yoga accessible and enjoyable for everyone. For inquiries or collaborations, feel free to reach out at contact@pureyogavibes.com.