The Wheel Pose, known as Urdhva Dhanurasana in Sanskrit, is one of yoga’s most powerful and invigorating backbends. This pose can seem intimidating at first, but with practice, it offers numerous benefits for both the body and mind. In this comprehensive guide, you’ll learn how to safely get into the Wheel Pose, its benefits, tips for beginners, and much more.
Whether you’re new to yoga or have been practicing for years, understanding the technique and significance behind this pose will help you deepen your practice.
What is the Wheel Pose (Urdhva Dhanurasana)?
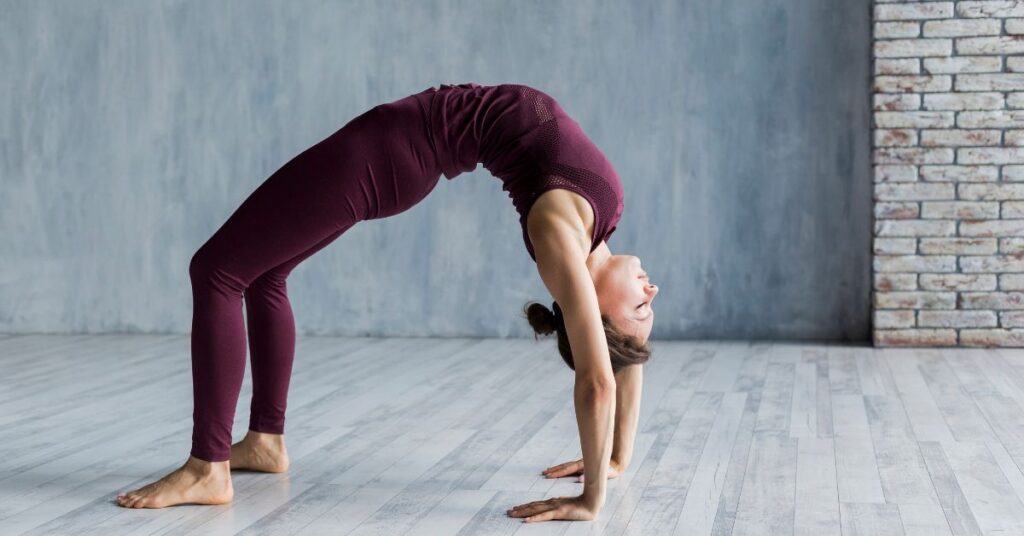
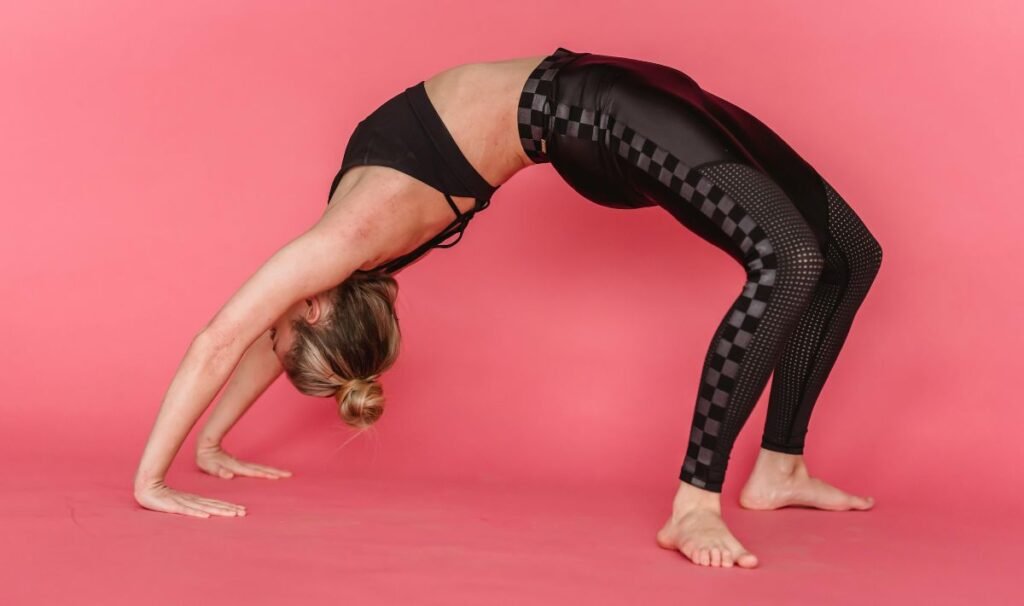
The Wheel Pose, or Urdhva Dhanurasana, is a challenging yet rewarding backbend pose. In Sanskrit, “Urdhva” means upward, and “Dhanurasana” translates to Bow Pose, creating the imagery of an archer pulling back a bow. This powerful posture opens the chest, strengthens the spine, and provides a full-body stretch, leaving you feeling energized and rejuvenated.
The Wheel Pose falls under the category of heart-opening poses. It’s often performed toward the end of a yoga session, offering a chance to build flexibility and strength in the body’s core and upper muscles.
Why is it called the Wheel Pose?
When in the full expression of the pose, your body forms a curved shape resembling a wheel. This position allows for an intense stretch of the front body, including the chest, abdomen, thighs, and hip flexors, while engaging the arms, shoulders, and legs to support your lift.
The Benefits of Wheel Pose Yoga
The Wheel Pose offers a wide range of physical and mental benefits that make it a favorite among seasoned yoga practitioners. Whether you’re looking to improve flexibility or boost your energy levels, practicing this pose regularly can significantly enhance your overall well-being.
1. Strengthens the Upper Body
The full Wheel Pose primarily engages the arms, shoulders, and back muscles, making it an excellent way to develop upper body strength. Pushing up into the pose requires significant force from your arms, which over time helps to build lean muscle.
2. Opens the Chest and Shoulders
Wheel Pose is an excellent heart-opener, which means it stretches the chest muscles and opens the front of the body. This can be particularly helpful for people who spend long hours sitting or working at a desk, as it helps to counteract the forward-slouching posture.
3. Improves Flexibility
Regular practice of the Wheel Pose helps improve flexibility in the spine, hips, and shoulders. This pose encourages a deep backward bend, which enhances your spine’s natural curve and can lead to greater mobility in everyday life.
4. Boosts Energy Levels
The intense stretch and heart-opening nature of the Wheel Pose activate the body’s energy centers, leaving you feeling more awake and energized. It stimulates the nervous system and can combat feelings of fatigue and sluggishness.
5. Enhances Mental Focus and Emotional Balance
Like many yoga poses, the Wheel Pose encourages mindfulness and mental clarity. The focus required to balance in the pose also helps calm the mind, reduce stress, and improve emotional resilience.
Readmore: King Arthur’s Yoga Pose
Readmore: Figure-4 Stretch Poses Guide
Step-by-Step Guide to Mastering the Wheel Pose

Mastering the Wheel Pose requires patience, strength, and flexibility. Follow this step-by-step guide to safely and effectively get into the pose:
Step 1: Prepare Your Body
Before attempting the Wheel Pose, ensure your body is warmed up. Engage in poses like the Cobra Pose (Bhujangasana) or Bridge Pose (Setu Bandhasana) to gently stretch the back and prepare the muscles.
Step 2: Lie on Your Back
Begin by lying flat on your back on your yoga mat. Bend your knees so your feet are placed flat on the floor, hip-width apart. Your heels should be close to your buttocks.
Step 3: Position Your Hands
Place your hands on either side of your head with your palms flat on the ground, fingers pointing toward your shoulders. Ensure your elbows are bent and facing upward.
Step 4: Press Into Your Hands and Feet
Inhale deeply. As you exhale, press firmly into your feet and hands, lifting your hips and torso off the ground. Straighten your arms as much as possible, allowing your head to hang freely.
Step 5: Lift Your Chest
Push your chest toward the wall behind you, lifting your heart up and back. Straighten your legs as much as you can, but keep a slight bend in the knees if necessary.
Step 6: Hold the Pose
Once in position, breathe deeply and hold the pose for 5-10 breaths, depending on your comfort level. Focus on elongating your spine and opening your chest.
Step 7: Release the Pose
To come out of the pose, slowly bend your arms and lower your body back down to the mat. Bring your chin to your chest and gently roll your spine down one vertebra at a time.
Mistakes and How to Avoid Them
Even though the Wheel Pose looks straightforward, there are a few common mistakes that can hinder your progress or even cause injury. Here are the most frequent errors and how to avoid them:
Mistake 1: Improper Hand Placement
Placing your hands too far apart or not aligning them properly with your shoulders can strain your wrists. Always ensure that your hands are shoulder-width apart and your fingers point towards your shoulders.
Mistake 2: Collapsing the Lower Back
If you rely too much on the flexibility of your lower back rather than distributing the bend evenly throughout your spine, you risk injury. Engage your core and focus on lifting from your upper back to avoid lower back discomfort.
Mistake 3: Splaying the Knees Outward
Allowing your knees to point outward can create an unstable foundation. Keep your knees in line with your hips to ensure proper form.
Readmore: How to Incorporate Yoga into Your Busy Schedule
Readmore: Yoga & Indian Culture
Wheel Pose Modifications for Beginners
The full Wheel Pose can be challenging, especially for beginners. Fortunately, there are several modifications you can use to gradually build strength and flexibility.
1. Bridge Pose (Setu Bandhasana)
Before attempting the full Wheel Pose, practice the Bridge Pose. This pose strengthens the back and legs while providing a gentle chest opening.
2. Use Yoga Blocks
If you struggle to lift yourself into the full pose, place yoga blocks under your hands. This will provide additional height and make it easier to press into the pose.
3. Partial Lift
Instead of going straight into the full pose, start by lifting your hips and chest halfway. This allows you to build strength and get used to the movement without straining your muscles.
Advanced Variations of the Full Wheel Pose
Once you’ve mastered the traditional Wheel Pose, you can explore some advanced variations to deepen your practice.
1. One-Legged Wheel Pose
To increase the challenge, lift one leg off the ground while holding the Wheel Pose. This variation intensifies the stretch in the supporting leg and requires additional balance.
2. Forearm Wheel Pose
For a deeper backbend and greater flexibility, try lowering your forearms while keeping your chest lifted. This advanced variation requires significant shoulder and upper body strength.
Safety Tips and Precautions
As with any advanced yoga pose, it’s important to practice the Wheel Pose safely to avoid injury.
1. Warm Up Thoroughly
Never attempt the Wheel Pose without warming up first. Stretching your back and shoulders before performing this pose will reduce the risk of injury.
2. Avoid Overarching the Lower Back
Pay close attention to how your back feels in the pose. If you feel any discomfort in your lower back, ease out of the pose and try a gentler backbend like the Bridge Pose.
3. Consult a Professional
If you’re new to yoga or have any pre-existing conditions, consider working with a certified yoga instructor. They can guide you in proper alignment and help you safely progress.
Conclusion:
The Wheel Pose, or Urdhva Dhanurasana, is a rewarding posture that challenges both strength and flexibility. By practicing this pose regularly, you can open your heart, build upper body strength, and boost your energy levels. Whether you’re a beginner or an experienced yogi, incorporating the Wheel Pose into your routine can help deepen your yoga practice and offer profound benefits for your body and mind.
Readmore: Snake Pose (Sarpasana)
Readmore: Half Bow Pose (Ardha Dhanurasana)
FAQs About Wheel Pose Yoga
Q1: How long should I hold the Wheel Pose?
Hold the pose for 5-10 breaths, depending on your comfort level. As you become more comfortable, you can gradually increase the duration.
Q2: Can I do the Wheel Pose if I have a back injury?
If you have a back injury, it’s best to consult a healthcare professional before attempting the Wheel Pose. You can work on gentler backbends first to build strength.
Q3: How often should I practice the Wheel Pose?
Practicing the Wheel Pose 2-3 times a week is sufficient for building strength and flexibility. Overdoing it can cause strain, so balance it with other poses.

Sonu is a passionate yoga teacher with over 6+ years of experience helping individuals find balance, strength, and inner peace through the transformative power of yoga. As the creator of Pure Yoga Vibes, Sonu shares expert insights, inspiring practices, and a wealth of knowledge to support your wellness journey. Dedicated to creating a space for growth and mindfulness, Sonu’s mission is to make yoga accessible and enjoyable for everyone. For inquiries or collaborations, feel free to reach out at contact@pureyogavibes.com.


