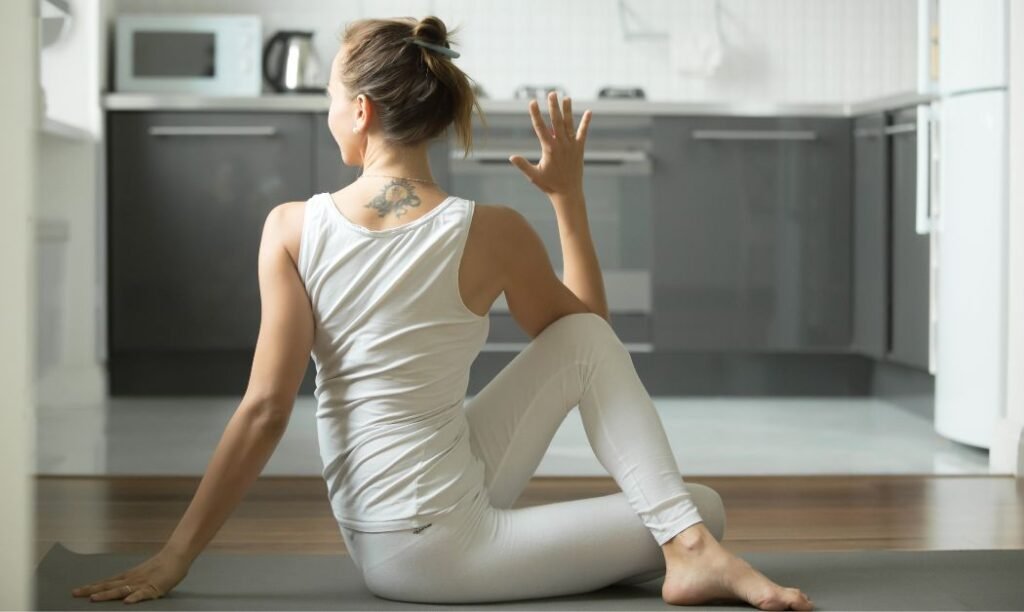
Yoga is filled with powerful poses that not only benefit the body but also calm the mind. One such pose is the Cow Face Pose (Gomukhasana). If you’re new to yoga or looking to deepen your practice, Gomukhasana is a fantastic stretch that targets areas of the body that often hold tension. In this guide, you’ll learn how to perform the Cow Face Pose correctly, its benefits, and some tips to help you master this posture.
What Is Cow Face Pose (Gomukhasana)?
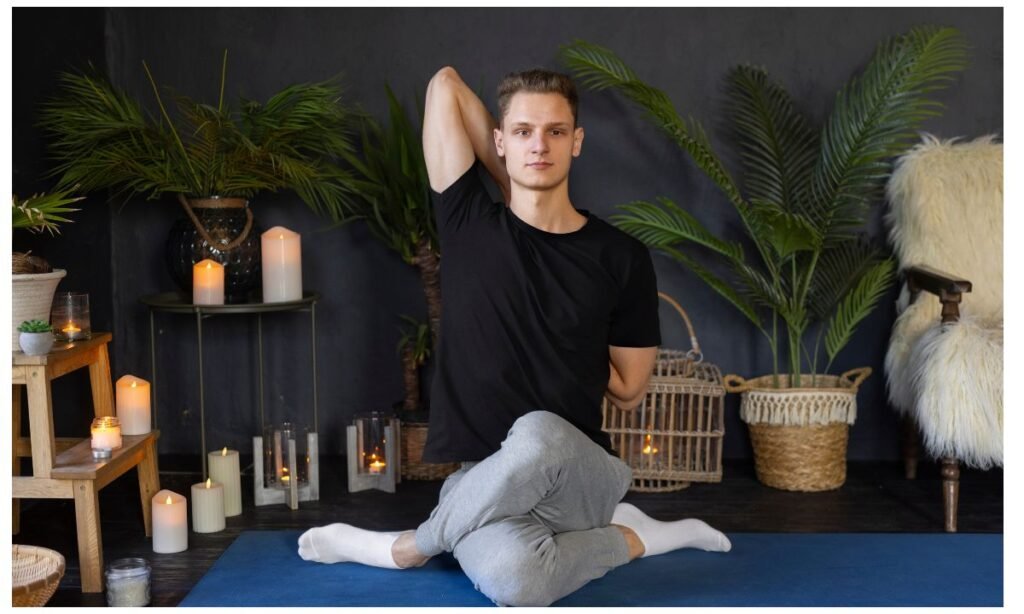
The Cow Face Pose, known as Gomukhasana in Sanskrit, is a seated yoga position that primarily stretches the hips, shoulders, and chest. In Sanskrit, “go” means cow, and “mukha” means face. When you look at the pose, it’s said that the legs resemble the face of a cow, hence the name. This classic pose is popular in many yoga practices for improving flexibility and promoting relaxation.
Why is Gomukhasana Important in Yoga?
This pose has a lot to offer in terms of both physical and mental well-being. Whether you’re an experienced yogi or a beginner, incorporating cow face pose yoga into your practice can improve your posture, increase flexibility, and help release tension in tight areas like the hips and shoulders. It’s a great pose to incorporate into a routine aimed at improving mindfulness and body awareness.
Benefits of Cow Face Pose Yoga
The cow face pose yoga benefits are numerous, and both beginners and advanced practitioners can enjoy them. Here’s a breakdown of its advantages:
- Improves Hip Flexibility
One of the primary targets of Gomukhasana is the hip joint. The seated position encourages a deep external rotation of the hips, which is perfect for anyone looking to open up tight hips after sitting for long hours.
- Enhances Shoulder Mobility
By intertwining your arms behind your back in cow face pose yoga, you get a deep stretch in the shoulders, chest, and triceps. This helps improve shoulder mobility and can be especially beneficial for athletes or individuals who spend a lot of time hunched over at a desk.
- Relieves Tension in the Spine
When done correctly, the gomukhasana pose encourages elongation of the spine. This helps relieve tension and can aid in improving posture, reducing back pain over time.
- Boosts Blood Circulation
Like many other yoga poses, the cow face pose enhances blood flow, particularly to the areas being stretched. Improved circulation can contribute to better energy levels and overall health.
- Promotes Relaxation and Focus
Because it’s a seated pose, Gomukhasana is ideal for meditation and breathing exercises. Practicing it with mindful breathing can help calm the mind, reduce stress, and increase concentration.
- Alleviates Neck Pain
The arms’ positioning in this pose can help alleviate stiffness and pain in the neck, making it a therapeutic stretch for those who suffer from frequent neck discomfort.
Readmore: Snake Pose (Sarpasana)
Readmore: Eight-Limbed Pose Yoga (Ashtanga Namaskara)
Step-by-Step Guide on How to Do Cow Face Pose
1. Start in a Comfortable Seated Position
Begin by sitting on the floor with your legs extended in front of you. You can sit on a yoga mat or a folded blanket for extra comfort.
2. Position Your Legs
- Bend your left leg and bring the foot underneath your right hip.
- Cross your right leg over the left, stacking your knees as much as possible. Your right foot should rest beside your left hip. Ideally, both knees should be aligned directly on top of each other.
- If stacking your knees is uncomfortable or difficult, you can place a folded blanket or yoga block underneath your hips for support.
3. Incorporate the Arms
- Stretch your right arm out to the side, then bend it and bring it behind your back. Your elbow should be pointing downward.
- Reach your left arm overhead and bend it, bringing your left hand to meet your right hand behind your back. Try to clasp your fingers together.
- If you cannot reach your fingers, don’t worry! Use a yoga strap or towel between your hands to bridge the gap.
4. Find Alignment and Focus on Your Breath
Once your legs and arms are in position, ensure that your spine is elongated. Press both sitting bones into the floor and lift your chest as you draw your shoulder blades together.
5. Hold the Pose
- Stay in cow face pose for 30 seconds to 1 minute, breathing deeply and steadily.
- As you hold the posture, focus on your breath, allowing each inhale to create space and exhale to deepen your stretch.
6. Release and Switch Sides
- To release the pose, first uncross your legs and then your arms.
- Repeat the pose on the opposite side by reversing the position of your arms and legs.
Mistakes to Avoid in Cow Face Pose
Even though the cow face pose seems simple, it’s easy to make some mistakes, especially for beginners. Here are a few things to watch out for:
1. Slumping the Back
Many people tend to hunch forward in this pose, especially when trying to clasp their hands behind their backs. To avoid this, focus on lifting your chest and keeping your spine straight. Sit on a block if necessary.
2. Forcing the Knees to Stack
If your hips are tight, stacking the knees directly on each other may feel impossible. Never force this position, as it could lead to injury. Use props like yoga blocks or folded blankets to provide extra support.
3. Overstretching the Shoulders
If you can’t reach your hands behind your back, don’t force it. Overstretching can lead to shoulder strain. Instead, use a strap to bridge the gap and gently ease into the pose over time.
Readmore: Yoga for Better Sleep Simple Poses
Readmore: The Best Foods for a Yogic Diet
Modifications and Variations of Gomukhasana
For individuals who find the traditional version of gomukhasana pose challenging, here are a few modifications and variations:
1. Use a Strap for the Arms
If your shoulders are tight, use a yoga strap or towel to connect your hands behind your back. This allows you to still benefit from the shoulder stretch without overextending.
2. Sit on a Block or Blanket
If you find it hard to sit with both hips grounded, elevate your seat by sitting on a block or a folded blanket. This makes the posture more accessible and allows you to focus on alignment rather than discomfort.
3. Modified Leg Position
For those with knee or hip issues, you can modify the leg position by keeping one leg straight in front of you rather than crossing underneath. This still provides a hip stretch but without the intensity of the full pose.
Who Should Avoid Cow Face Pose?
While cow face pose offers many benefits, certain people may need to avoid this posture or proceed with caution.
- Individuals with shoulder injuries should avoid the arm stretch, which can strain the shoulder joints.
- Those with knee injuries or tight hips should modify the leg position to prevent aggravating existing issues.
- If you experience pain or discomfort in the lower back, make sure to maintain a neutral spine and avoid rounding your back.
Final Thoughts
The cow face pose (gomukhasana) is a highly beneficial yoga posture that stretches tight areas, increases flexibility, and promotes relaxation. Whether you’re looking to release shoulder tension or improve hip mobility, this pose has a lot to offer. Remember to approach the posture with mindfulness, focus on your breath, and use props when needed to support your body. With consistent practice, you’ll gradually deepen the stretch and enjoy the full range of benefits that this amazing pose has to offer.
So, roll out your yoga mat and give Gomukhasana a try—your body and mind will thank you!
Readmore: 15 Best Heart-Opening Yoga Poses
Readmore: Bound Angle Pose (Baddha Konasana)
Frequently Asked Questions (FAQs)
1. Is Cow Face Pose Good for Beginners?
Yes, beginners can practice cow face pose, but they may need to modify the position of their arms and legs. Using props like yoga blocks and straps can make the pose more accessible.
2. Can Cow Face Pose Help with Back Pain?
Yes, Gomukhasana can help alleviate back pain by promoting spinal elongation and improving posture. However, if you have severe back issues, consult a healthcare professional before practicing.
3. How Long Should I Hold Cow Face Pose?
You can hold cow face pose yoga for 30 seconds to 1 minute on each side. Make sure to breathe deeply and avoid rushing through the pose.
4. What Should I Do if I Can’t Clasp My Hands?
If you cannot clasp your hands behind your back, use a yoga strap or a towel. Over time, as your flexibility increases, you’ll be able to bring your hands closer together.

Sonu is a passionate yoga teacher with over 6+ years of experience helping individuals find balance, strength, and inner peace through the transformative power of yoga. As the creator of Pure Yoga Vibes, Sonu shares expert insights, inspiring practices, and a wealth of knowledge to support your wellness journey. Dedicated to creating a space for growth and mindfulness, Sonu’s mission is to make yoga accessible and enjoyable for everyone. For inquiries or collaborations, feel free to reach out at contact@pureyogavibes.com.