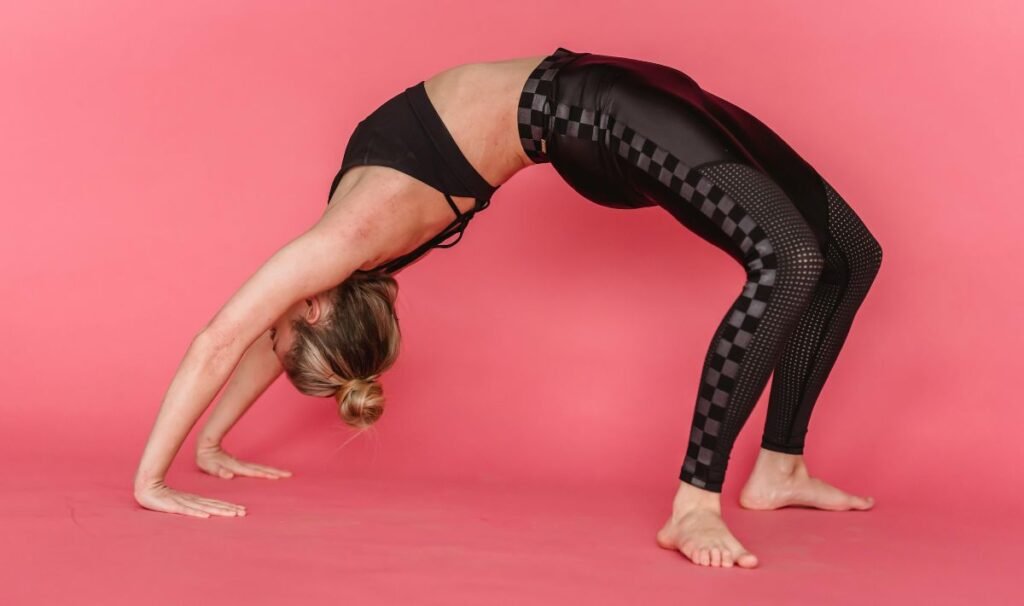
The figure-4 stretch is a simple yet effective way to improve flexibility, relieve tension, and unlock a new level of comfort in your body. Whether you’re a fitness enthusiast, a yogi, or someone looking to alleviate everyday aches, mastering this stretch can transform your routine. But how do you do it correctly, and why should you include it in your regimen? Let’s dive in!
What Is the Figure-4 Stretch?
The figure-4 stretch gets its name from the position your legs create when performing the stretch. One leg crosses over the other, forming the shape of the number “4.” This pose targets the hips, glutes, and lower back, making it a favorite among athletes, office workers, and anyone with tight hips.
This stretch is versatile, with variations for all fitness levels and body types. From lying down to sitting or standing, you can adapt the figure-4 stretch to meet your needs.
Benefits of the Figure-4 Stretch
Why should you add the figure-4 stretch to your routine? Here are some of its top benefits:
1. Improves Hip Mobility
Tight hips can restrict movement and lead to discomfort. The figure-4 stretch loosens the muscles around the hips, increasing flexibility and mobility. This can enhance your performance in activities like running, cycling, and yoga.
2. Reduces Lower Back Pain
Many people experience lower back pain due to tight glutes and hip flexors. By stretching these areas, the figure-4 stretch can help alleviate tension and reduce pain.
3. Eases Sciatic Nerve Pain
If you’ve ever dealt with sciatica, you know how debilitating it can be. The figure-4 stretch gently stretches the piriformis muscle, which can press against the sciatic nerve and cause discomfort.
4. Enhances Posture
Sitting for long periods can cause your muscles to tighten and your posture to suffer. Regularly practicing this stretch can help counteract the effects of prolonged sitting, keeping you upright and aligned.
5. Promotes Relaxation
Stretching doesn’t just benefit your body—it’s great for your mind too. The figure-4 stretch encourages you to slow down, breathe deeply, and relax, which can reduce stress and improve mental well-being.
Step-by-Step Guide to the Figure-4 Stretch
Here’s how to perform the figure-4 stretch safely and effectively:
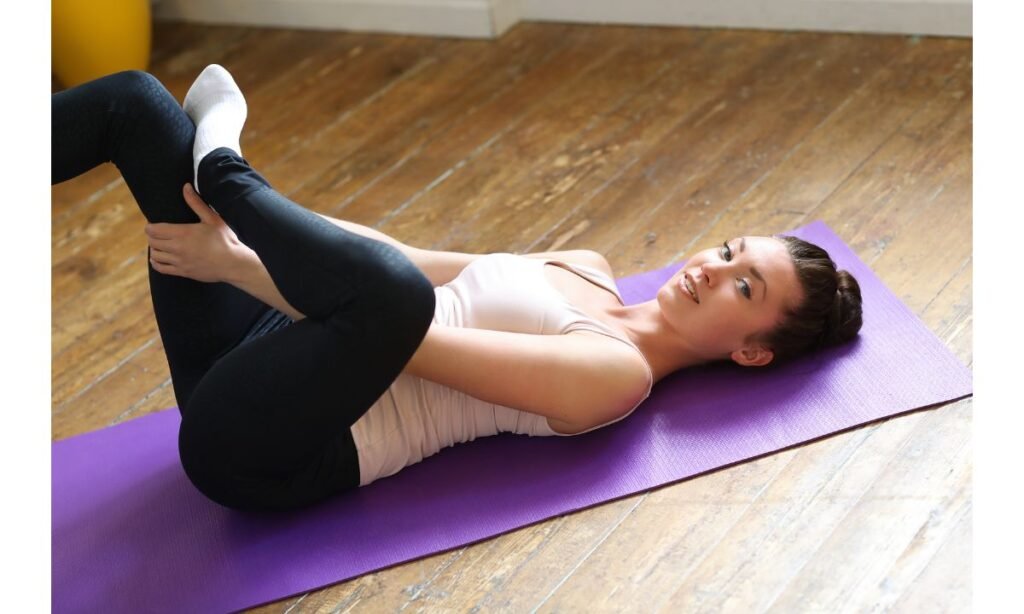
1. Supine (Lying Down) Figure-4 Stretch
This is the most beginner-friendly version of the stretch.
Steps:
- Lie on your back with your knees bent and feet flat on the floor.
- Lift your right leg and cross your right ankle over your left thigh, just above the knee. Your legs should form a figure “4.”
- Thread your hands behind your left thigh and gently pull it toward your chest. Feel the stretch in your right hip and glute.
- Hold the stretch for 20-30 seconds, then switch sides.
Tips:
- Keep your back flat against the floor.
- Avoid straining your neck by resting your head on the ground.
- Use a towel or strap around your thigh if you have limited flexibility.
2. Seated Figure-4 Stretch
Perfect for quick stretches during work breaks or when sitting on the floor.
Steps:
- Sit on a chair with both feet flat on the ground.
- Lift your right leg and place your right ankle over your left thigh.
- Gently press your right knee down while leaning forward slightly. Feel the stretch in your hip.
- Hold for 20-30 seconds, then switch sides.
Tips:
- Sit tall and avoid rounding your back.
- Adjust the intensity by leaning more or less forward.
3. Standing Figure-4 Stretch
This version challenges your balance and adds a standing element to the stretch.
Steps:
- Stand tall with your feet hip-width apart.
- Lift your right leg and cross your ankle over your left thigh.
- Bend your left knee and sit back as if you’re lowering into a chair. Keep your hands on your hips or bring them together in front of your chest for balance.
- Hold for 20-30 seconds, then switch sides.
Tips:
- Focus on a point in front of you to maintain balance.
- Use a wall or chair for support if needed.
Cues for Proper Form
Proper form ensures you get the most out of the figure-4 stretch while avoiding injury. Keep these cues in mind:
- Engage Your Core: A strong core supports your spine and helps maintain alignment.
- Relax Your Shoulders: Avoid tensing your shoulders; keep them down and away from your ears.
- Breathe Deeply: Don’t hold your breath. Inhale deeply through your nose and exhale through your mouth to deepen the stretch.
- Don’t Force It: Stretching should feel good, not painful. If you feel discomfort, ease off.
Common Mistakes to Avoid
While the figure-4 stretch is relatively simple, there are a few common mistakes to watch for:
1. Arching Your Back
Arching your back can reduce the effectiveness of the stretch and strain your lower back. Keep your back flat and supported.
2. Pulling Too Hard
Pulling too forcefully can lead to overstretching or injury. Be gentle and let your body ease into the stretch.
3. Ignoring Your Breath
Holding your breath can create tension and limit your range of motion. Stay mindful of your breathing throughout the stretch.
Variations and Modifications
Not everybody is the same, and that’s okay! Here are some ways to modify the figure-4 stretch:
1. Using Props
If you can’t reach your thigh, use a yoga strap, belt, or towel to help.
2. Wall-Assisted Stretch
Perform the supine version with your bottom leg against a wall for added support.
3. Dynamic Version
Turn the stretch into a movement by alternating sides without holding, which can help with mobility.
When to Practice the Figure-4 Stretch
Incorporate the figure-4 stretch into your routine at these times:
- After Workouts: Cool down and relax tight muscles.
- During Breaks: Counteract long hours of sitting.
- Before Bed: Wind down and prepare your body for rest.
FAQs
1. How often should I do the figure-4 stretch?
You can practice this stretch daily, especially if you have tight hips or lower back pain. Aim for 2-3 sets on each side for 20-30 seconds per set.
2. Can beginners do the figure-4 stretch?
Absolutely! The supine version is beginner-friendly and easy to modify using props like a strap or towel.
3. What if I feel pain while doing the stretch?
Stop immediately if you feel sharp pain. You might be overstretching or putting strain on your joints. Adjust your position or consult a professional for guidance.
4. Is the figure-4 stretch good for sciatica?
Yes, it can help relieve sciatic nerve pain by stretching the piriformis muscle, which may be pressing on the nerve.
5. Can I do the figure-4 stretch at work?
Yes! The seated variation is perfect for quick desk breaks to loosen tight hips and improve posture.
Final Thoughts
The figure-4 stretch is a powerful tool for improving flexibility, reducing pain, and enhancing overall well-being. With its adaptability and numerous benefits, there’s no reason not to give it a try. Remember to listen to your body, practice regularly, and enjoy the process. Before you know it, you’ll feel more limber, relaxed, and ready to tackle whatever comes your way.
So, what are you waiting for? Grab a mat, find a comfy spot, and let the figure-4 stretch work its magic!

Sonu is a passionate yoga teacher with over 6+ years of experience helping individuals find balance, strength, and inner peace through the transformative power of yoga. As the creator of Pure Yoga Vibes, Sonu shares expert insights, inspiring practices, and a wealth of knowledge to support your wellness journey. Dedicated to creating a space for growth and mindfulness, Sonu’s mission is to make yoga accessible and enjoyable for everyone. For inquiries or collaborations, feel free to reach out at contact@pureyogavibes.com.